Using WiFi in the Raspberry Pi Pico (Part 3)
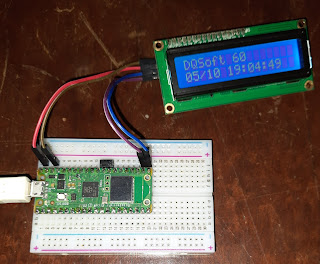
As the next step in my studies, I implemented a SNTP client. I also connected an alphanumeric display, so there was something to see in the photo.
Compiling for the Pico W using Visual Code
Thought having Visual Code already set for the plain Pico, it took me sometime to set things for compiling a program for the Pico W (the "Getting Started" guide shows only compiling using the command line). I used Windows in this test, but the settings should also work under Linux.
- In the CMakeLists.txt file, put "set(PICO_BOARD pico_w)"
- Also in CMakeLists.txt, add the current directory to the list of include directories "target_include_directories(projeto PRIVATE ${CMAKE_CURRENT_LIST_DIR} )"
- Still in CMakeLists.txt, put pico_cyw43_arch_lwip_poll in the library list (target_link_libraries)
- Copy the lwipopts_examples_common.h file from pico_examples\pico_w to your working directory with the name lwipopts.h
I, unintendedly, built the debug version. This cause some interesting messages to be sent to stdio.
Connecting the Display
Nothing very special here. I disregarded my own advice and connected the 3.3V Pico directly to the I2C interface of the 5V display. Do that at your own risk!
I adapted the code from some old project.
The SNTP Client
I started from some code I wrote before, but the TCP communication is very different in the Pico W (as compared to the Arduino libraries). I tried to write something a little more readable than the SDK examples. My original code used synchronous functions (that block until they finished), in this version everything is done asynchronous (the SNTPupdate() function must be called periodically ).
DNS is consulted before each access to the SNTP server, like in the SDK example. Thanks to the local caching actual communication is not done at every call.
The final result can be seem at https://github.com/dquadros/SNTP_PicoW (with Portugues comments).


Comments
Post a Comment