Using an SD Card with the RP2040
I found on Twitter an interesting project that uses an SD Card connected to a Pimori's Tiny RP2040. This aroused may curiosity on connecting an SD Card to a RP2040. Here is what I found so far.
 |
| My take on the RC2040 |

Here we are only interested in the SPI mode that requires four signals (plus +3,3V and ground): MISO, MOSI, SCK and CS. All signals are 3.3V; that is fine with the Pi Pico but require level shifters for 5V microcontrollers (like Arduino Uno, Nano, etc). In my tests I connected the RP2040 SPIO pins directly to a microSD to SD adapter and an SD module; external pull-ups may necessary.
In case you are curious about the SD Cards commands and responses, I suggest two sites:
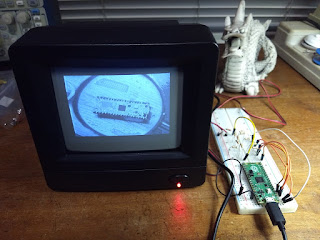
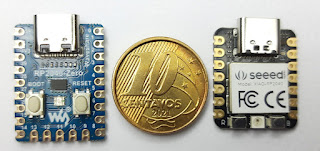
In my first test I soldered a microSD to SD adapter to a RP2040 Zero (more about this board soon) and used the software from the original article (it worked fine).
For my second test I connected a Pi Pico to an "SD Card Module" to have a first look at the library used to access the SD Card. You will also find a "Micro SD Card Module", there are some differences between the two (besides the size of the card). The microSD version has a CD4050 buffer/converter that allows to safetily connect to 3,3 and 5V microcontrollers. The full size version has a double row connector with two pins for each signal; the end result is that it is not breadboard friendly and adds no advantage. Both modules have a 5V to 3,3V regulator, so you should power it with 5V. The microSD version looks a better option (unless you want to use full size SD Cards), but what I have is the full size version.
 |
| Connecting the SD Card Module to the Pi Pico |
Again, no external pull-ups. It looks like the module has a pull-up in the MISO signal.
The library I used can be downloaded at https://github.com/carlk3/no-OS-FatFS-SD-SPI-RPi-Pico. It has many nice features and is tailored to the Pi Pico (including using DMA for the SPI communication). Here is what I did for a quick test under Windows (I already had the C/C++ SDK installed as described in the "Getting Started with Raspberry Pi Pico" manual).
1) Download the library (here I am using Git Bash)
  cd {working-dir}
  git clone --recurse-submodules https://github.com/carlk3/no-OS-FatFS-SD-SPI-RPi-Pico.git
2) Edit the no-OS-FatFS-SD-SPI-RPi-Pico\example\hw_config.c file, replacing the initialization of sd_cards to reflect our connections:
// Hardware Configuration of the SD Card "objects"
static sd_card_t sd_cards[] = {  // One for each SD card
    {
        .pcName = "0:",           // Name used to mount device
        .spi = &spis[0],          // Pointer to the SPI driving this card
        .ss_gpio = 17,            // The SPI slave select GPIO for this SD card

        .use_card_detect = false,
        .m_Status = STA_NOINIT,
    }
};
3) Generate the example program. Open a development prompt using Windows / Visual Studio 2019 / Developer Command Prompt and enter the following commands
  cd {working-dir}
  cd no-OS-FatFS-SD-SPI-RPi-Pico\example
  mkdir build
  cd build
  cmake -G "NMake Makefiles" ..
  make
I have not tested on Linux yet, but it should be something like this:
  cd {working-dir}
  git clone --recurse-submodules https://github.com/carlk3/no-OS-FatFS-SD-SPI-RPi-Pico.git
  # edit the no-OS-FatFS-SD-SPI-RPi-Pico/example/hw_config.c file as above
  cd no-OS-FatFS-SD-SPI-RPi-Pico\example
  mkdir build
  cd build
  cmake ..
  make
There were a few warnings during compilation but it did not stop the program from working. Will take a closer look at that latter.
Slip an SD Card into the module, press and hold the BOOT button on the Pi Pico and connect it to the PC. When you release the button a RPI-RP2 drive will show up, copy FatFS_SPI_example.uf2 into it. The drive will disappear, replaced by a serial port. Use the Device Manager to find out what is its COM name. Connect to this port at 115200bps (I used PuTTY for this) and press Enter. A '>' prompt will appear. You can type "help" Enter to see a list of the commands supported by the example.
"mount 0:" should recognize the card, in case of errors check the connections and try another card. If it is working, use the commands "cd" and "ls" to explore the content of the card.
For a final test, use the "setrtc <DD> <MM> <YY> <hh> <mm> <ss>" command to set the date and time (you can check it with the "date" command). Then enter "start_logger" to start recording on the card the readings of the RP2040 internal temperature sensor. After a few minutes, use "stop_logger" to finish. You can use the "cat" command to look at the result, it is in a csv file in a subdirectory of /data.
The documentation on the functions available in the library can be seen at http://elm-chan.org/fsw/ff/00index_e.html. Notice that functions can be enabled and disabled at no-OS-FatFS-SD-SPI-RPi-Pico\FatFs_SPI\ff14a\source\ffconf.h.
In all, its a very comprehensive library that can be used in many ways and I look forward to using it in my projects.

Comments
Post a Comment