MicroPython Module for the MMA8452 Accelerometer
The MMA8452 sensor is a three axis accelerometer with additional functions to simplify its use. In this post we are taking a quick look at it and making a MicroPython module to use it.
The figure bellow (from the datasheet) is a block diagram of the MMA8452. Acceleration on the X, Y and Z axis are measure by transducers whose capacitance changes with acceleration. These capacitances are converted to voltage and digitized by a 12-bit ADC (we can configure it to 8-bit for faster conversions).
What distinguishes the MMA8452 from other accelerometers is the presence of a DSP (Digital Signal Processor) that is able to detect special conditions (like freefall). This conditions can be checked by the microcontroller, generate an interrupt or affect the power saving mode (sleep) of the sensor.
As usual, the microcontroller interface is through registers (the MMA8452 has dozens of them) that are accessible through an I2C serial interface. This interface can work in normal (100kHz) and fast (400kHz) modes and its address can be selected between 0x1C and 0x1D.
The sensor itself works at 3.3V, but the module I am using has not only a regulator for powering it at 5V but also, to my surprise, the circuit needed to safely connect it to a 5V I2C bus (I found the schematic on this ad). While this is not needed for connecting the modulo to the Raspberry Pi Pico (or other boards running at 3.3V), it is nice to see that it can safely be used with the 5V Arduinos.
To use this sensor with the Pi Pico running MicroPython I adapted Sparkfuns's C++ code for the Arduino into a MicroPython module. It can be download from github.
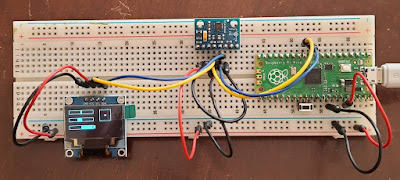
A basic test is include in the module. The assembly for this test is shown bellow, please notice that I used the default I2C pins in MicroPython and the default address for my sensor module).


Comments
Post a Comment