Posts

Showing posts from May, 2022

A Closer Look at Digital Input in the RP2040

Image
Last post we look at digital output in the RP2040 microprocessor (used in the Raspberry Pi Pico). Now let's take a closer look at digital input. The object of digital input is, of course, to check if a pin has a high or low voltage level applied. Looking again at the logical structure of an RP2040 pin, we will notice that the input signal, coming from the I/O pad can be directed to a peripheral (one of them is the GPIO that does digital input) and to the interrupt logic (IRQ). It can also be inverted before going to GPIO or IRQ. source: RP2040 datasheet

A Closer Look at Digital Output in the RP2040

Image
Digital output seems pretty simple, specially if you are using the Arduino runtime. A call to digitalWrite() will put a pin in high or low level. Is that all? No... in this post we will look at some important details about digital output in the RP2040 (the microcontroller used in the Pi Pico). A four digit 7 segment display connected to the Pi Pico

Project: Making a Timer with the Raspberry Pi Pico

Image
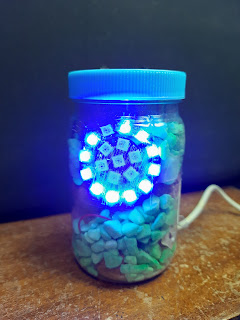
 Here is a simple and fun project: a countdown timer using an RGB LED rings and a Pi Pico. The assembled timer (this was first posted in my  Portuguese blog  in July 20, 2021)

Mini Reviews: Waveshare RP2040 Zero and Seeed XIAO RP2040

Image
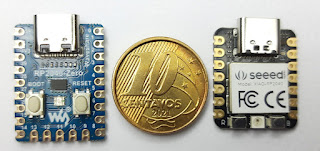
 Two boards with the Raspberi Pi Pico's RP2040 microcontroller. They are similar: small form factor and a USB-C connector. Let's see what is the same and what is different between them. The boards beside a Brazilian 10 cents coin

Using the PIO to interface a HC-SR04 Ultrasonic Sensor

Image
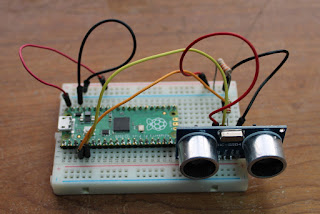
The more I get to know the PIO, the more opportunities to use it I see. This time the device to interface is the well known HC-SR04 ultrasonic sensor .

MicroPython or CircuitPython?

Image
The Raspberry Pi Pico (and other RP2040 based boards) can be used with both MicroPython and CircuitPython. Let's look what they are and what is different between them.

Using an SD Card with the RP2040

Image
I found on Twitter an interesting project that uses an SD Card connected to a Pimori's Tiny RP2040. This aroused may curiosity on connecting an SD Card to a RP2040. Here is what I found so far. My take on the RC2040

Using the PIO to Interface a PS/2 Keyboard

Image
One of the most intriguing features of the RP2040 used in the Raspberry Pi Pico is the PIO - Programmable Input/Output . It allows us to execute small programs that handle digital input and output independently to the ARM Cortex M0+ Cores. For my first study of the PIO I decided to interface a PS/2 keyboard. In the past I have interfaced one of these keyboards to a Arduino Nano, reading the bits one by one in an interrupt generated by the clock signal. Using the PIO, the main processor will receive a complete byte in one go. An old but working PS/2 keyboard

First Week With the Raspberry Pi Pico - One Year After

Image
This was first posted in my Portuguese blog in March 9, 2021. I was following the news of the Pi Pico from its announcement and bought a few boards as soon as they were available in Brazil.  My precious!

Booting a New Blog

Hi, my name is Daniel Quadros . I am an Electronic Engineer, but have always worked as a software developer. Hardware is a hobby for me, and the last two decades a had a lot of fun with microcontrollers. I have a blog and YouTube channel, both in Portuguese (I live in Brazil).  I toyed for years with the idea of publishing part of this material in English... Well, there is a new microcontroller board in town, the Raspberry Pi Pico, and I decided to chronicle here my studies, experiences and projects. Looking back, it's been a whole year since I wrote the past two paragraphs! But this time it will really happen! Hope it will help (and maybe entertain) a few people.